Tutorials

Posted

Sat Jan 14 2012, 12:12pm

By Aaron Parecki

Categories

API
Tutorials

Tagged

Export your places from SimpleGeo Storage to Geoloqi

This tool will allow you to transfer your SimpleGeo Storage data over to Geoloqi. It makes Geoloqi Layers for each SimpleGeo Layer, and converts Records to Geoloqi Places for each of the layers.

All you need to run the command is a Geoloqi Access Token, and the SimpleGEO OAuth Key and Secret. You can sign up for a Geoloqi account at The Geoloqi Web Site and retrieve your access token from the Geoloqi Developers site.

This script is provided as an executable via Rubygems, which means it runs on any Mac OSX computer out-of-the-box (and on any Windows/Linux machines with ruby available).

Installation

Open up a terminal and run this in the command line:

$ gem install geoloqi-simplegeo-import

Usage

Run the script from the command line:

$ geoloqi-simplegeo-import YOUR_GEOLOQI_ACCESS_TOKEN YOUR_SIMPLEGEO_OAUTH_KEY YOUR_SIMPLEGEO_OAUTH_SECRET

The script will output information on the transferred data, and give you a link to our Layer Editor so you can see and edit your Layers and Places (we have a GUI interface for your data!).

Places in Geoloqi

Searching for Nearby Layers and Places

With Geoloqi you can search for nearby layers and places very easily with these two API calls:

You can experiment with running these API calls directly from cURL or from our Developers Console:

We have SDK libraries for Ruby, JavaScript, Node.JS, PHP, and more coming very, very soon.

There is a lot of other stuff you can do with Geoloqi, such as geolocation triggers/callbacks and geo-messaging. Visit our web site to read more about us (and where we’re going).

Bugs

Feel free to file any issues on Github, we will respond to them as soon as possible. If you need any features here we haven’t provided, don’t hesitate to contact us.

TODO

This is a quick-fix solution. However we are planning on making a more stable, complete tool for importing data to Geoloqi from other sources (and for exporting your data out of Geoloqi). We feel it’s in your best interest to have total control of your data at all times, and we want to help you solve problems, including the problem of transferring data between your machine and cloud services.

Posted

Sat Apr 2 2011, 2:14pm

By caseorganic

Categories

Features
News
Tutorials

Tagged

New! Embed a Geoloqi map on your site or blog with a custom widget!

If you’re a food cart, tour group, cyclist, canvasser, or any other type of person who might benefit from sharing your location, you can now embed a Geoloqi map on your site!

Here’s how to do it!

Embedding a Geoloqi Map on your site or blog

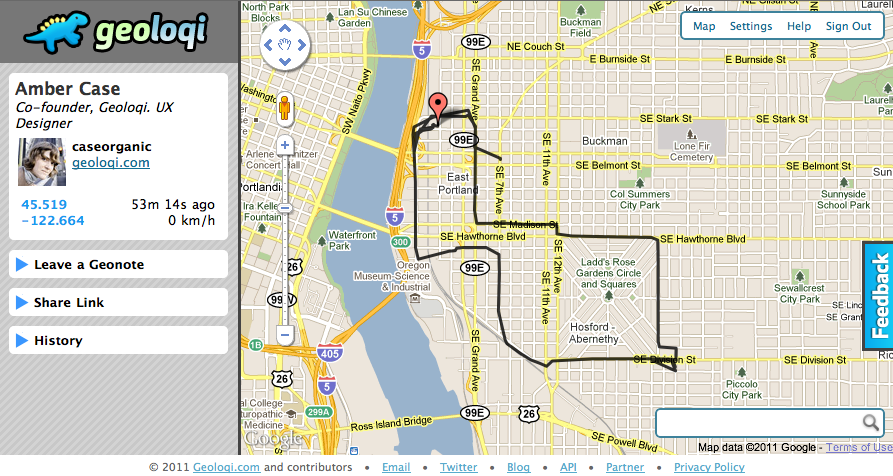
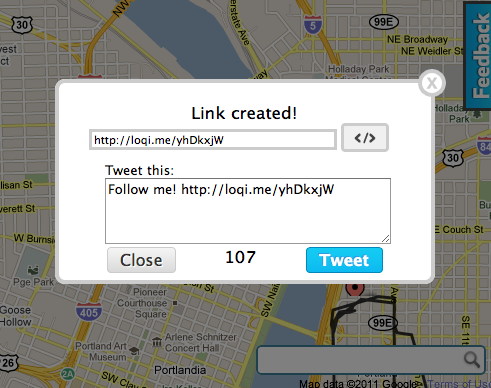
Go to your map screen in Geoloqi and click on the “Share Link”.

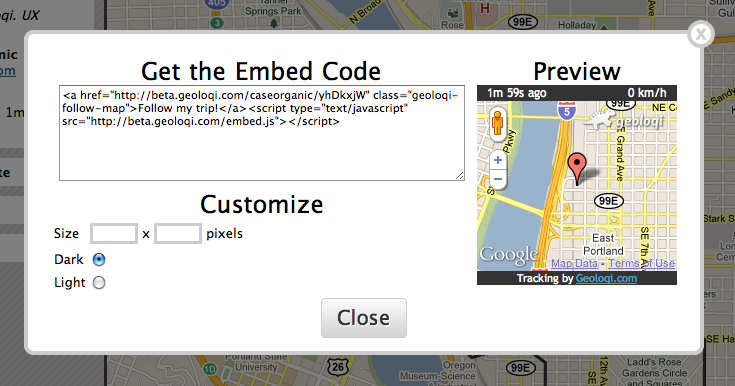
When the link is created, click on the embed icon </> to the right of the link.

The embed code will automatically be created! You can customize the size by any sort of pixels you’d like. To include a live updating map on your site, simply copy and paste the embed code into your HTML! 

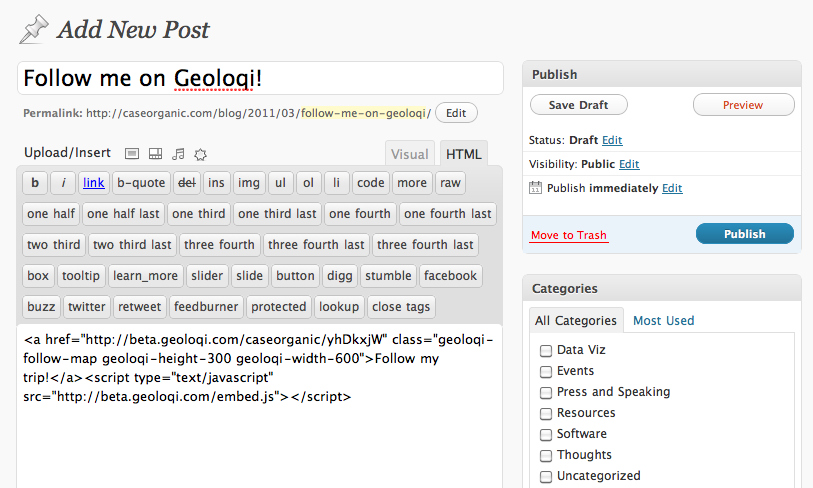
Embedding a map into a WordPress page or blog post is easy. Note that you can only embed Geoloqi maps into your own hosted WordPress website and not a wordpress.org site. Simply click on the HTML button in your post editor and paste in the embed code. You can change the dimensions in code if you’d like your map to be larger or smaller.

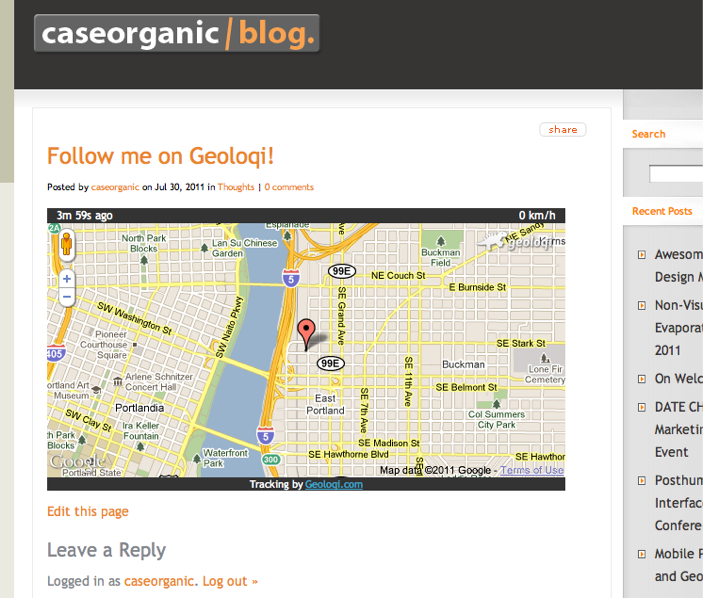
When you publish your post you’ll see your map! Visitors to your site will be able to watch you in real time. If you turn off your tracker they won’t be able to see your location anymore!

Embed a Map into a WordPress Widget!

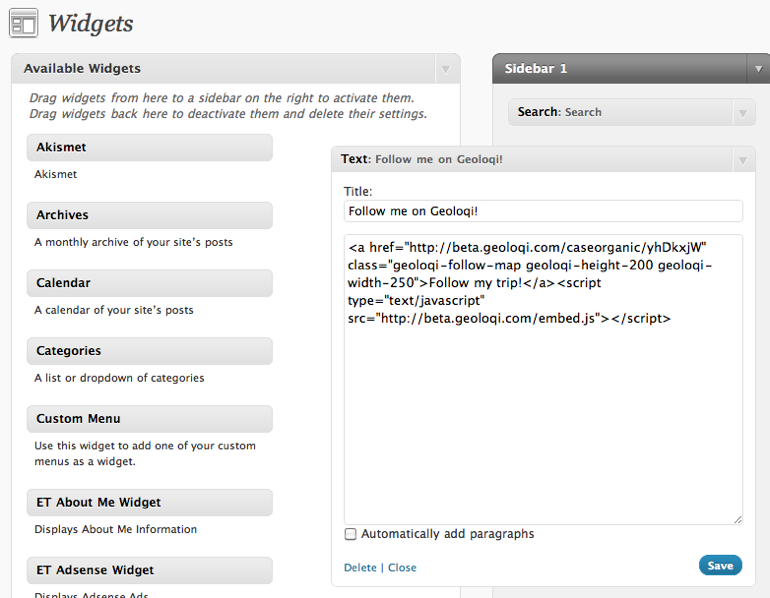
To embed a map into a WordPress widget, simply copy and paste the embed code into the widget editor in your WordPress account or site. Click “Save” and load your site to see the map!

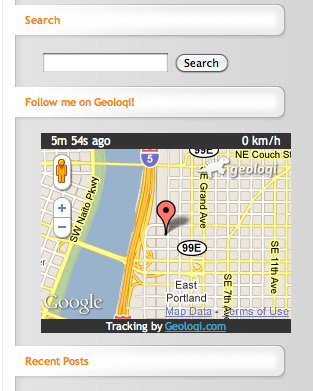
Here’s what a sample Geoloqi map in a side widget on a WordPress site:

Privacy

Worried about privacy? Don’t worry, when you turn off the Geoloqi tracker the map will turn blank and won’t show your current location.

Enjoy using Geoloqi! If you embed a map in your site let us know! We’d love to see it.

Posted

Tue Jan 4 2011, 8:20pm

By caseorganic

Categories

About
Features
Tutorials

Tagged

Four things to try when you first use Geoloqi

Geoloqi for iPhone - Beta Test
We’re slowly rolling out beta applications! If you’re part of the first batch, you’ll be able to try out these features below. If you haven’t been sent an invite, the following will be what to expect!

Important
Make sure you’ve gone to http://beta.geoloqi.com and entered in a password. You’ll need this to sign into the iPhone app.

Four things to try when you first use Geoloqi

1. Send a Geonote to yourself.
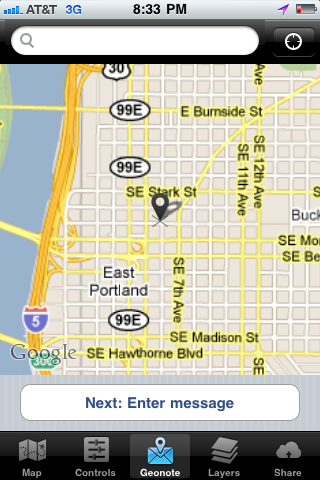
Geoloqi Geonote Screen

The Geonote option allows you to leave a message in a location and have it texted or pushed to you when you get to that location.

On the phone or on the web, send a note to yourself at a location. Browse to the place you’d like to leave the Geonote, enter text, and hit “Send”. Your Geonote will be pushed to you when you go to the location next.

I regularly use Geonotes to leave notes at the office when I’m at home, and notes at the grocery store. For instance, I needed to get some Paprika, so I left a note at the store. When I got there next, I got a text that said, “Remember to pick up the paprika, you dork! You always forget!’.

I’ve also found Geonotes handy for travel. For instance, I set a Geonote at the Oakland airport when I was preparing a trip down there. When I arrived at the airport, I got a text that said, ‘Welcome to Oakland! Take the AirBart to Bart, and then to Embarcadero station!’. I also left a Geonote at the Embarcadero station that sent me the address of the house I was staying at. Each of these notes saved me from having to look up the address or travel instructions or address on Google maps or in my E-mail. The ‘just-in-time’ information allowed me to sit back, relax, and enjoy the trip. The best technology gets out of the way and lets you live your life.

In the next release, we’ll have integration with Rememberthemilk, so that you’ll be able to leave your to-dos at specific locations and get those to-dos pushed or texted to you when you arrive at that location. For now, you’ll have to enter your items manually through the phone or on the website.

Geonotes for Other People
You can also leave notes for other people. For instance, you could leave a note for your spouse on the way back from work to remember to get something on the way home. If you want to experiment with creating Geonotes, you can send a Geonote to Aaron Parecki and I at http://caseorganic.com/geonote or http://aaron.pk/geonote. Invite others to send you a Geonote. Share the link with people to have them leave you Geonotes. http://beta.geoloqi.com/profilename.
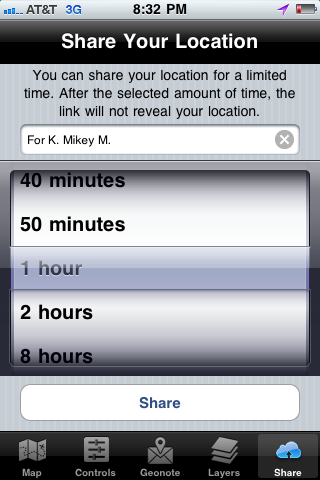
Share Your Location with others with Geoloqi

2. Share your location with someone you’re meeting.

Use the share screen on the Geoloqi app to send a link and set an expiration time.

The person you share your location with doesn’t need to have Geoloqi. They’ll get a link to a mobile version of Geoloqi that they can use on their device. They’ll be able to see your location move in real-time from the time that you shared the link to the time you set it to expire.

To see the links you’ve shared, go to http://beta.geoloqi.com/settings/share. You’ll be able to see the link descriptions you entered there, as well as the expiration times of those links!

If you want to share a link for an unlimited period of time, choose the “No time limit” option on the share screen wheel.

3. Add the earthquake notification layer to your account.
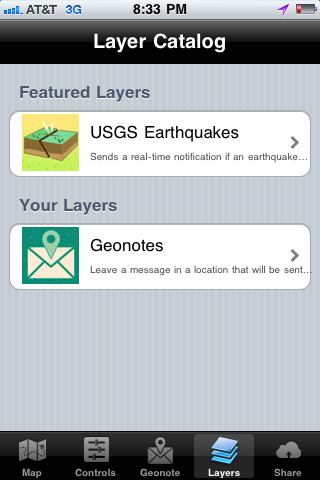
Geoloqi Layer Catalog

The earthquake notification layer will let you know if an earthquake has happened within 250km of you in real-time. It’s simply a demo of what can be done with realtime data and Geoloqi. You can build your own custom layer of geolocated data that Geoloqi users can subscribe to. Examples include gelocated Wikipedia history entries, happy hour specials, located-based games and other trivia. If you’d like to build your own layer, contact us at [email protected].

To add the layer, go to the Layers option on your phone and click on the Earthquake layer. Switch the option from ‘Off’ to ‘On’ to subscribe. This is where the automatic Foursquare checkin option will exist in future releases.

4. View your map at http://beta.geoloqi.com/map to see your location history.
As you track yourself, you’ll be able to see a trail of where you’ve been over time. Try toggling the history options to see more of your history.
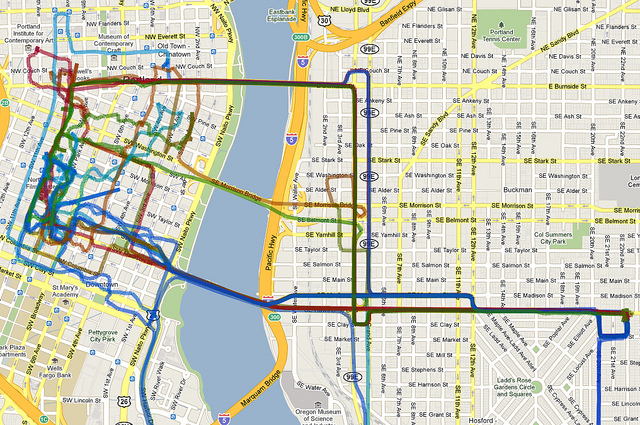
Usage Tips
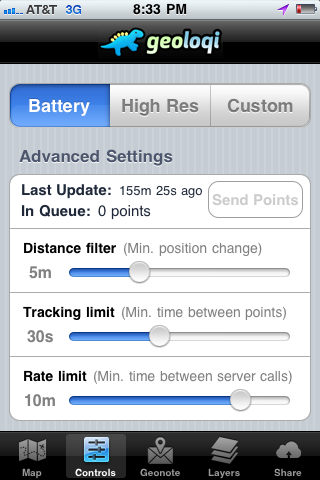
Geoloqi Battery Saver Mode
Don’t leave the application running all day. It will quickly drain your battery.

For best results, track with Battery Saver mode, or a custom mode of your choice.

For even better results, turn on the tracker when you you’re moving, and turn it off when you arrive in a location. Else, turn the tracker on when you’re going to meet someone that you’ve shared a link with.

Help and Feedback
If you need help or have further questions, go to Geoloqi Help. All feedback can go to Aaron or I through E-mail, or send E-mail to [email protected] for best results! Thanks again for testing Geoloqi!

Posted

Tue Jan 4 2011, 5:17pm

By caseorganic

Categories

Tutorials

Tagged

How to Use Geoloqi with an Android Phone

Note: Geoloqi no longer works with Instamapper

Note: This tutorial used InstaMapper, a free GPS tracking and location sharing service. After nearly 5 years of operation, the site shut down on December 13th, 2012. There are now dedicated Geoloqi apps for Android. You can now download Geonotes or Geotracks for Android.

Flickr photo by tomsun

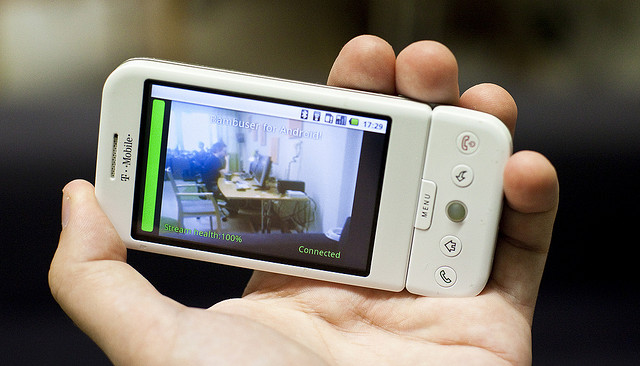
If you have an Android or Blackberry, you can use Geoloqi right now. Currently, the Geoloqi app is in beta testing. The first Geoloqi app release is for iPhones running 4.0 or later, however, Geoloqi has Instamapper integration, which means that you can use Geoloqi, including sending yourself Geonotes, if you have a Blackberry or Android. The only difference is that you’ll have to use the Geoloqi.com website to leave yourself Geonotes – only the iPhone version will allow you to do it from the phone.

1. Log into http://beta.geoloqi.com and enter your phone number in the field provided. Then go to http://beta.geoloqi.com/settings/connections.

Under “Geolocation Services” you’ll see “Instamapper Device Key”. Click the “Create” button. A Device Key will appear shortly afterward.

2. Go to the Android store on your phone and find a free app called GPS Tracker by Instamapper.

Download the app and start running it. Click on “Menu” and click on “Settings”. You’ll see a field to enter your device key that you generated on Geoloqi. Enter that key there.

The rest of the settings concern what interval you’d like the GPS tracker to track at. Setting the tracker to track every 5 seconds will wear down your battery more quickly, but it will give you a very high resolution trail to look at on your map on Geoloqi.com. Set the buffer size at 100, and don’t worry about the Units. Imperial is fine. Setting Minimum accuracy (ft) to 1000 is also recommended. This way, Geoloqi will ignore points that are less accurate than 1000ft.

General Functions:
Press the “Menu” key to bring up settings.
Press the “Home” key to run GPS Tracker in the background.
Press the “Back” key to quit tracking.

A note on battery life:
GPS is powered on continuously for send intervals less than 121 seconds. If you want better battery life, set the send interval to at least 121 seconds. This will cause GPS Tracker to go to sleep in-between updates.

From there on out, you can use all the features of Geoloqi available on the website. Click on your map to see your history, share a link with others, and send yourself a Geonote by drawing a radius on the map, writing a message, and clicking send. If you share your location with someone, they’ll get a mobile version of your trail on their mobile phone, and a web version of your trail on the web.

You can toggle your privacy options at http://beta.geoloqi.com/settings/privacy and see your list of shared links at http://beta.geoloqi.com/settings/share. All of your account settings are at http://beta.geoloqi.com/settings/profile.

Finally,if you want to quickly access your map, you can easily do so by going to http://beta.geoloqi.com/username or where the username is the id of the Twitter account you used to sign in. If you didn’t sign in with Twitter, go to the connections tab in Geoloqi to connect your Twitter account. You’ll then be able to easily access your Geoloqi account by username URL.

Additional Help
If you have more questions, see Geoloqi Help. If you can’t find what you need there, please ask a question! We’ll get to it as quickly as we can.

Flickr photo by tomsun.

How to Use Geoloqi with a Blackberry Phone

Note: Instamapper no longer supports Blackberry. This tutorial is now expired.

Blackberry photo by Mr. T in DC on Flickr

If you have a Blackberry, you can use Geoloqi right now. Currently, the Geoloqi app is in beta testing. The first Geoloqi app release is for iPhones running 4.0 or later, however, Geoloqi has Instamapper integration, which means that you can use Geoloqi, including sending yourself Geonotes, if you have a Blackberry or Android. The only difference is that you’ll have to use the Geoloqi.com website to leave yourself Geonotes – only the iPhone version will allow you to do it from the phone.

1. Log into http://beta.geoloqi.com and enter your phone number in the field provided. Then go to http://beta.geoloqi.com/settings/connections. Under “Geolocation Services” you’ll see “Instamapper Device Key”. Click the “Create” button. A Device Key will appear shortly afterward.

2. Install the “GPS Tracker” application from BlackBerry App World or download it over the air: http://www.instamapper.com/download/GPSTrackerBB.jad
For BlackBerry Storm, you can also try this binary with a higher resolution icon: http://www.instamapper.com/download/GPSTrackerStorm.jad

3. Start the application (look for an icon that looks like a satellite) and enter the 13-digit device key you got from the Geoloqi website.

Usage Notes:

  • Press the red hangup key to run GPS Tracker in the background.
  • Press the “Escape” key to quit tracking.
  • To have GPS Tracker start automatically when the phone boots, check “Auto-start on boot” in settings.

During the first few days of operation, the application will periodically pop into foreground. This is done to minimize the possibility that someone would use our service to track another person covertly (which is against our terms of service). Press the red hangup key to hide the application when it surfaces.

Notes on Support
All recent BlackBerries (OS version 4.2.1 and later) are supported. In particular, almost any BlackBerry bought from AT&T and Sprint should work out of the box. Note, however, that many BlackBerries do not have built-in GPS and need an external GPS receiver. Additionaly, some carriers (most notably Verizon) disable GPS access on their BlackBerries. If you have a Verizon phone, it will most likely not work. Corporate phones may also restrict access to network and/or GPS.

Enjoy using Geoloqi! If you run into any problems, or would like more information on how Geoloqi works, see Geoloqi Help. If you don’t find what you’re looking for, feel free to ask a question! We’ll be there to answer it.

Flickr photo credit: Mr. T in DC.